Community Guide - For Mirrors

You will need access to _create and manage Discord channels_ as well as many other administration permissions. If you do not have those, please reach out to your Discord administrators for help with this setup.
✅ Step 1: Create your Discord server
If you haven't already, you will need to have your own Discord server ready to go, or one that you're creating for the sake of learning how conversational flow works.
Running the standard create Discord screen
✅ Step 2: Invite HephBot Discord into your server
Go ahead and use this invite link to add the bot with the permissions it needs. You do not need Administrator if you use that link. For a full list, see Required Bot Permissions.

Inviting HephBot Discord via the invite link and granting Admin
If you are prepared to manage the permissions, first remember that the bot may have future updates and need new permissions, and secondly you will need to ensure the bot has access to the following:
View Channels
Manage Channels
Manage Webhooks
Send Messages
Send Messages in Threads
Create Public Threads
Embed Links
Attach Files
Add Reactions
Read Message History
Use Application Commands
Manage Messages (recommended)
See Required Bot Permissions for details.
✅ Step 3: Prepare your server for the conversational flow
There are 2 ways to do this, one way would be to allow members to choose their own language roles, and the then grant them access to a mirrored copy of your server, the second way is similar but have a lot of shared channels and have a mirrored and translated “chat” channel that you would need to give access to. The first way is much more complicated but more streamlined for the end user, the second way is easier on smaller communities and groups of friends.
Let's start the preparations for the first method… complex language views (name pending)!
If you don't want to do the complex ways, skip to the buddy method.
Complex Language Views
✅ Step 4: Convert your server to a community server
You will need your server to be setup as a community server to grant roles on join. I'll give a quick guide here, but feel free to reference the Official Discord guide.
Go to your Server Settings > Enable Community > Getting Started > Follow the guide. It'll walk you through role granting after you have converted your server over!
Enabling community in Discord for the first time
✅ Step 5: Create language roles
You will need to make language roles per language that your server is going to support.
Go to Server Settings > Roles > Create Role. Here we will need to walk through creating each and every role.
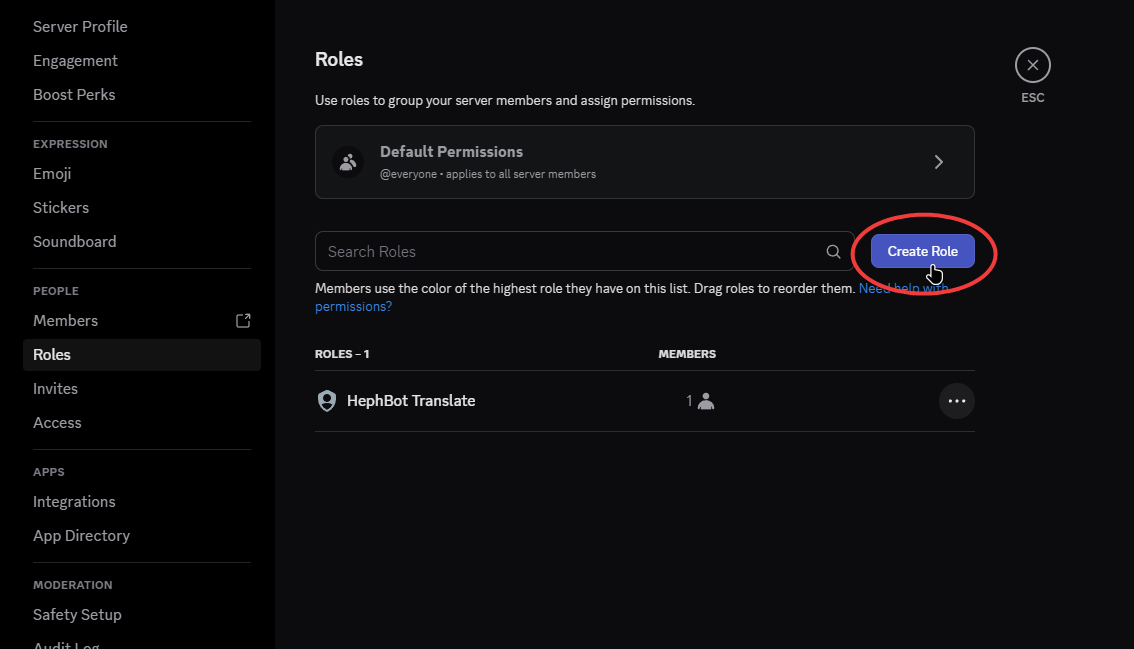
The Create Role button
Name your first role whatever language you want to support, in this example we'll add Spanish.
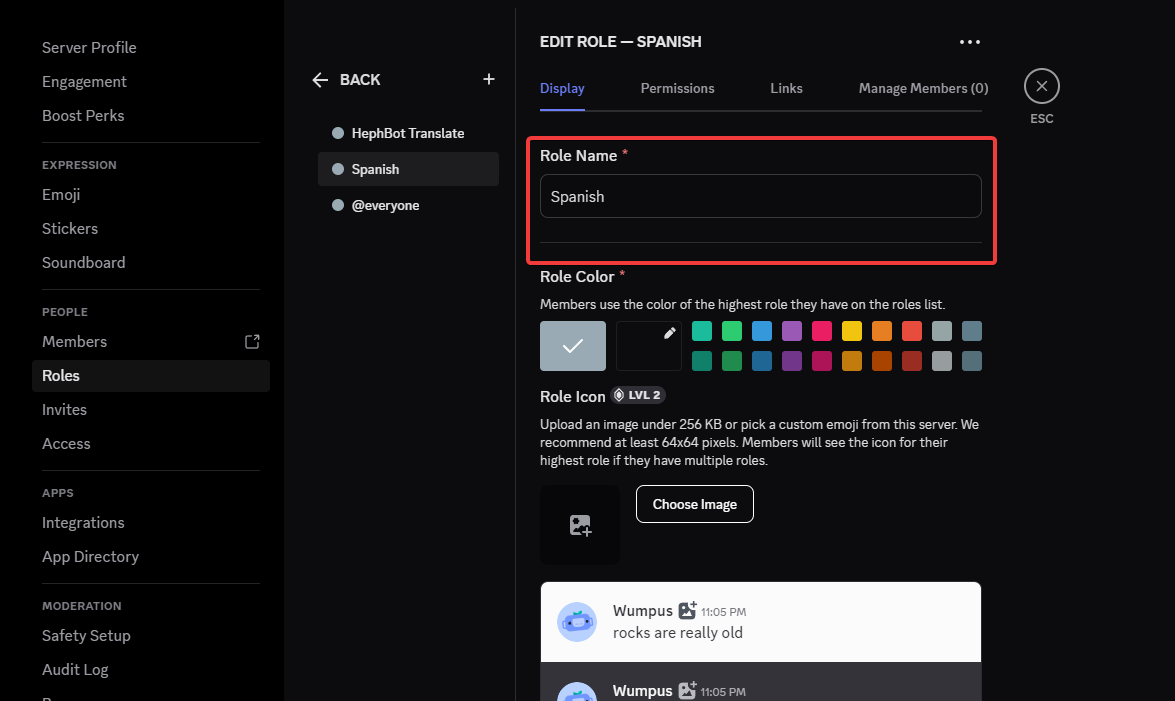
Naming the role Spanish
And make sure to create another one, like English.
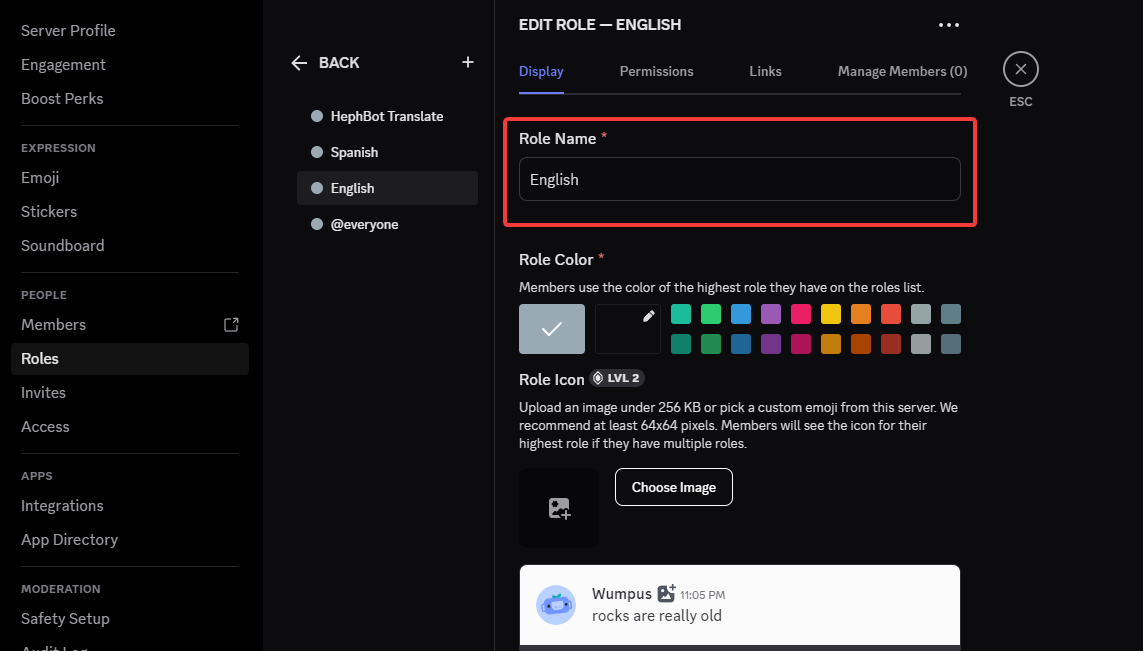
Naming another role English
And that's all it takes to create some roles. Now let's set up onboarding to allow your members to select them!
✅ Step 6: Setup Onboarding
Now go to Server Settings > Onboarding and walk through the setup process, and make sure you add qualifiers on join for the roles!
Discord requires that your server is more prepared to take on a community, make sure you have at least 7 channels, and 5 where @everyone can read and send messages.
My setup
Take the time to add a few more channels to your liking. I will add my shared information channels about my server, maybe a media channel. You can always add some, set it up, and remove them afterwards, just know that Discord doesn't like this very much.

Enabled my 7 channels
After getting past default channels, now is the time to allow users to customize their experience and select their language roles!
Create a question asking what language do they speak, and then create the answers with roles attached, make this a pre-join question and your discord will be ready immediately!
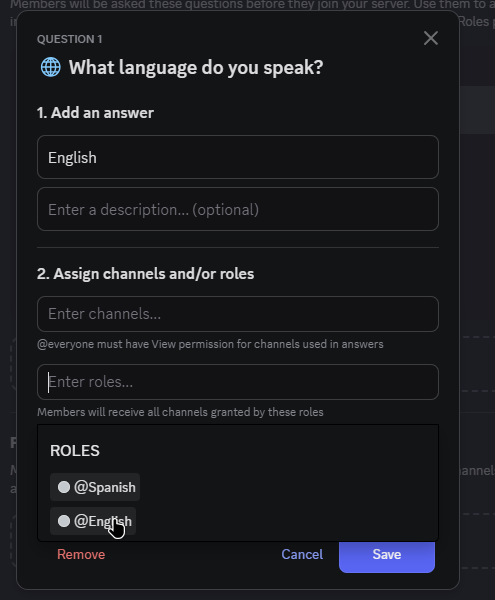
Selecting English role on the English answer
And now you can enable Onboarding, next up is setting the bot up to play nice and channel permissions!
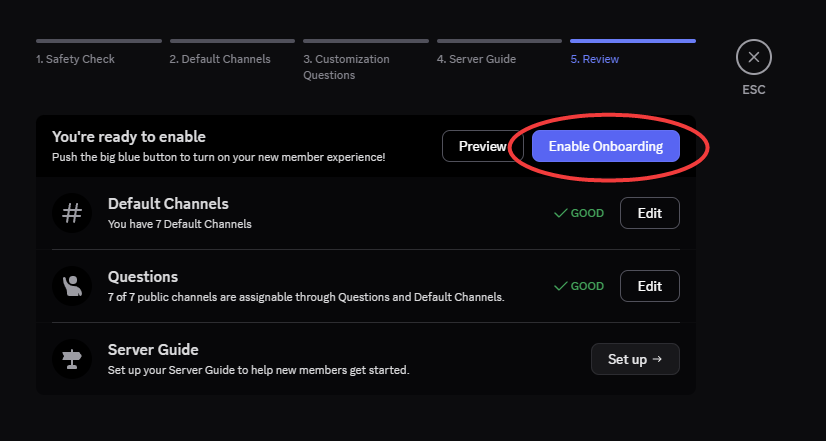
Enable Onboarding button
✅ Step 7: Created mirrored channels for your other languages
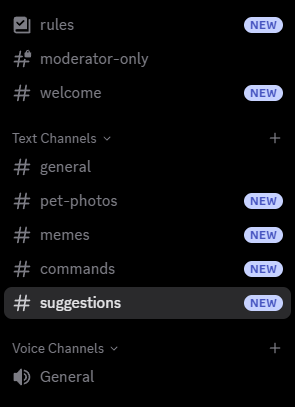
So now we'll create mirrored channels per channel that we'll then connect via conversational flows. I have a couple, #general, #pet-photos, #memes, and #suggestions that I want to mirror. I have reorganized and created copied channels with an es attached.
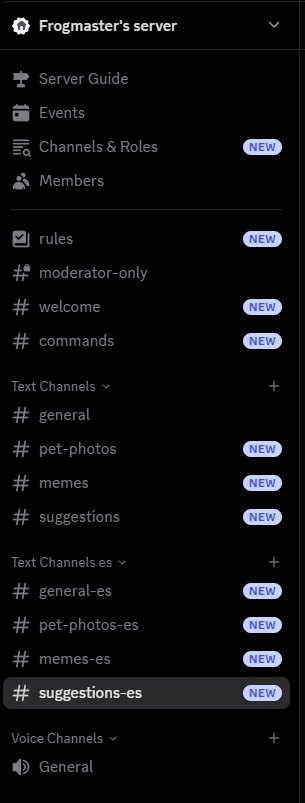
My mirrored Channel list
Now I'm going to change all of the permissions to grant the Spanish role access to the es variations, and to remove access to the English channels. Since I already have categories setup, I can just manage the category above to change every channel's settings.
Changing channel permissions
Now you can test it by viewing the Discord with the 2 roles and see what the discord looks like!
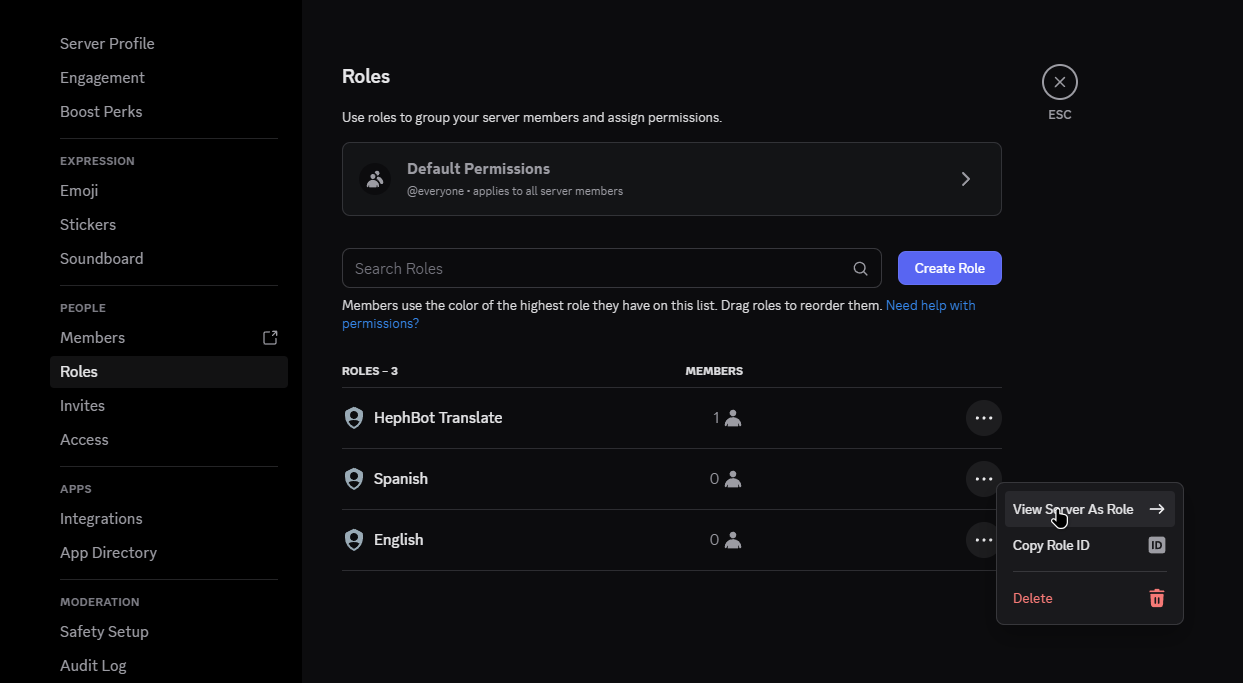
Viewing the server as a particular role button
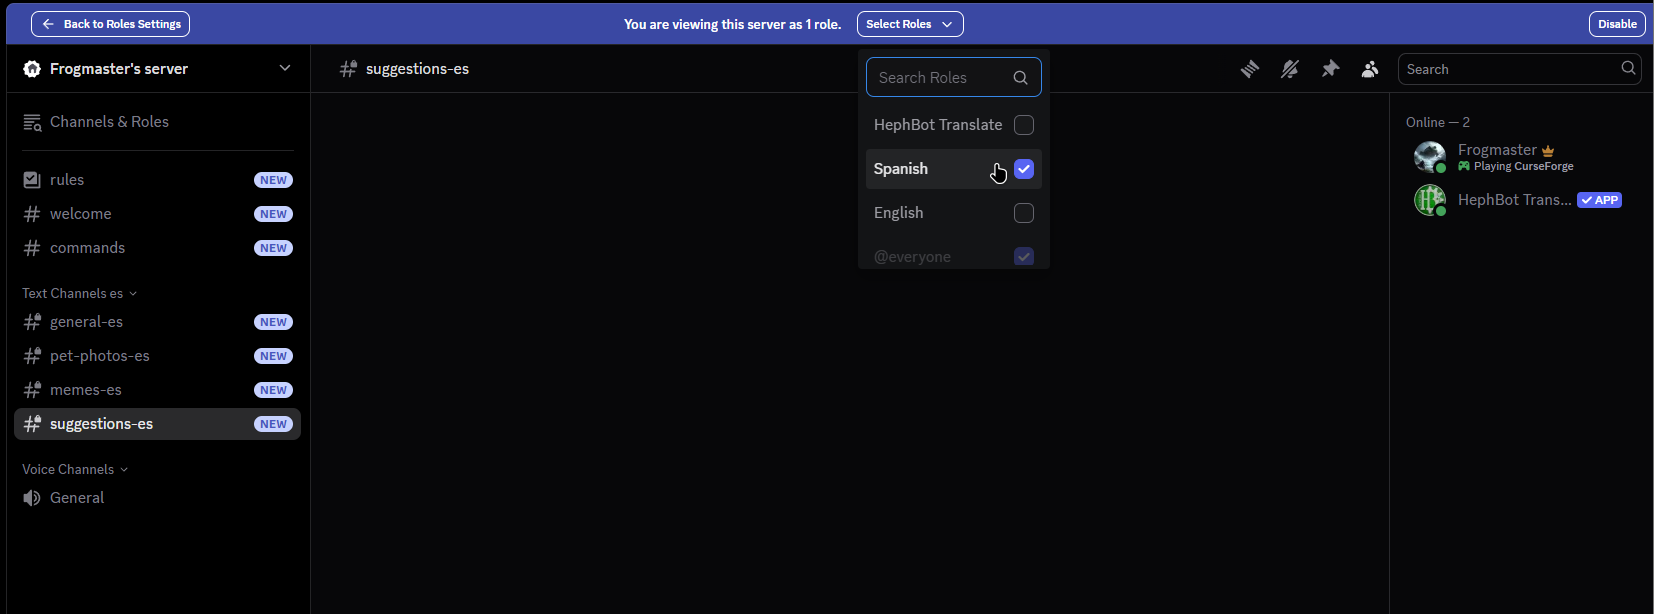
Viewing as the Spanish Role
✅ Step 8: Enable Mirrors!
Now all we have to do is generate the mirror, and all is complete!
The best method is to just utilize the dashboard by following the guide, or you can do it the old fashion way.
And that's it, it'll work from here! Give it a shot!
Showing off the setup working
The buddy method
Assuming you have a server already created and you just want your buddy to be able to chat faster, just simply create a channel, hide it for yourself and others, and grant them access!
The idea is simple, your buddy still uses the #memes channel, or #pet-photos channels, but when chatting they would just speak in the channel native to themself, this setup is simple, great for friends who want to engage, but not so overwhelming that you need to setup anything complex. The only downside is they would need to translate every conversation that might happen outside of the general chat, maybe someone responding to that meme that was posted for example.
✅ Step 4: Add a new channel for your buddy
I'll name it, #general-es because they speak Spanish to make it obvious the purpose of the channel.
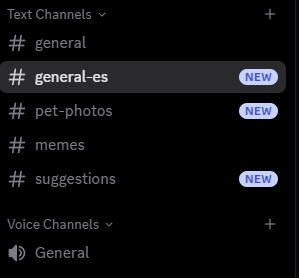
Showing off the general-es buddy method
✅ Step 5: Setup the permissions
Change the permissions so that your buddy can talk and read it, but @everyone cannot, it may be easiest to use a role so that other users who join later may have access if needed! Who knows maybe your buddy has buddies? Feel free to reference step 5 of the Complex Language Views method if you need help with permissions.
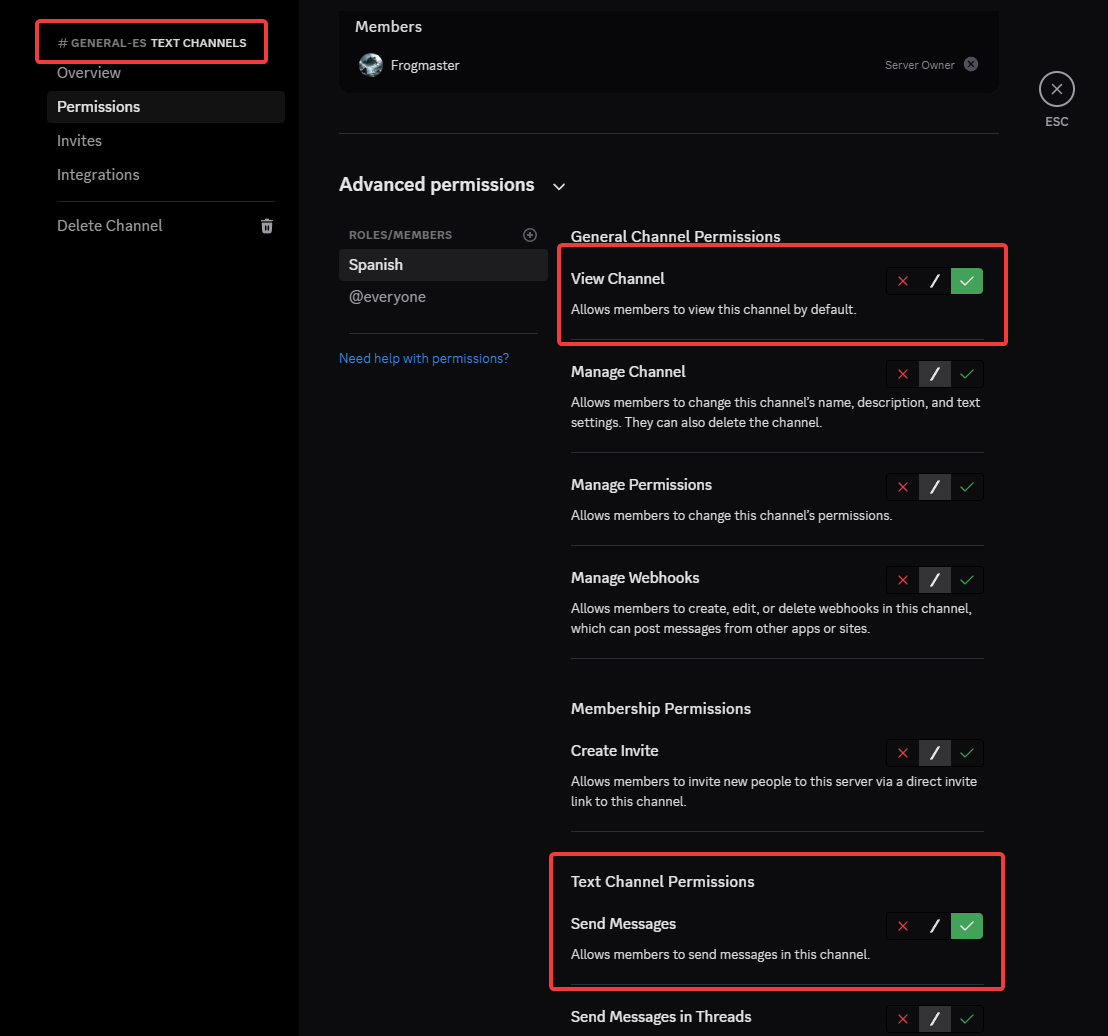
Channel settings allowing the Spanish speaker access
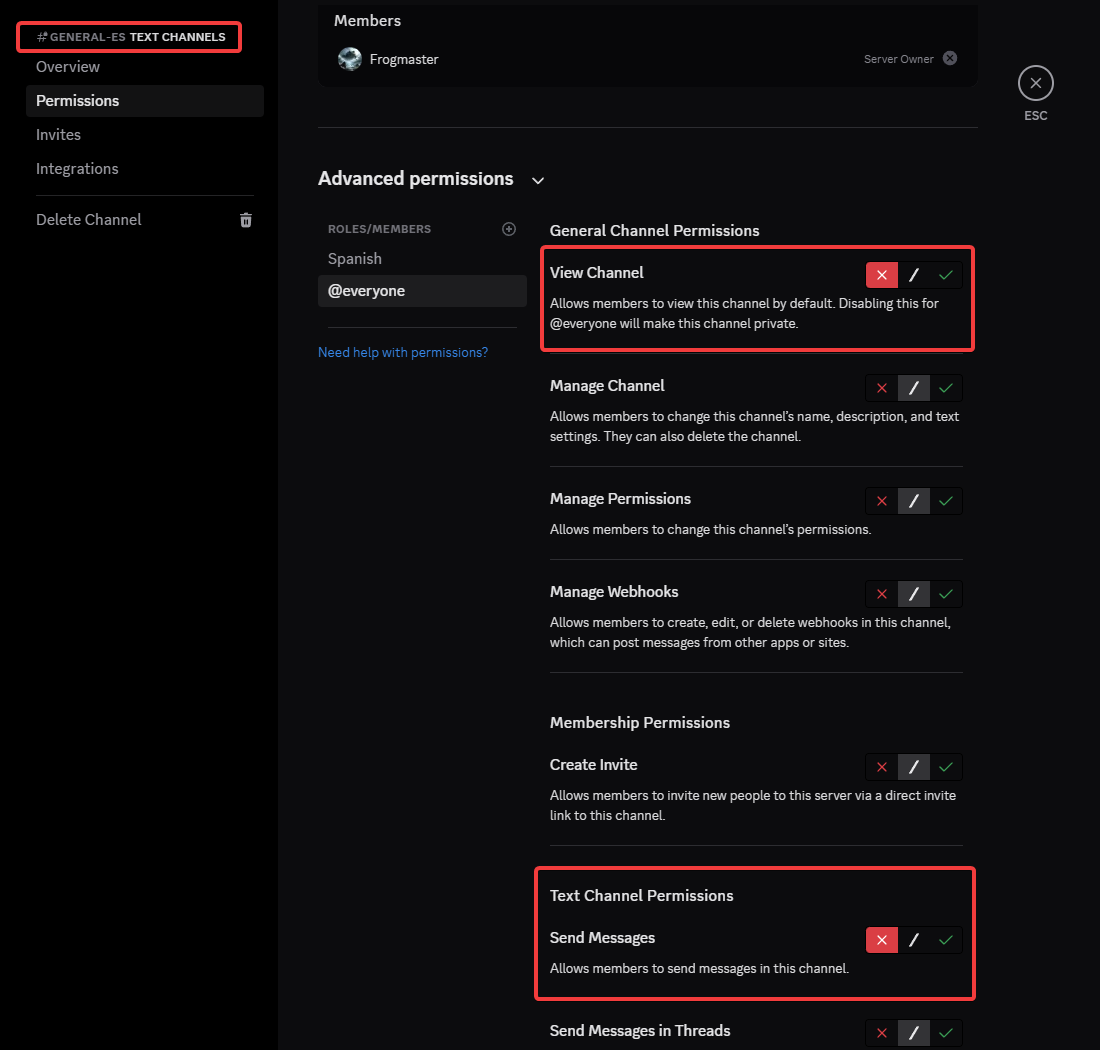
Removing access for regular users to reduce clutter
✅ Step 6: Enable conversations
Now all we have to do is generate the conversational flow, and all is complete!
/conversation add - Generates the conversation that you will be assigning channels to
/conversation assign conversation:<generated_ID> channel:#channel_name language:chosen_language - Assign a channel to that conversation, you will need to do this more than once for a single conversational flow, or you can use /conversation multiadd if you have many channels to add.
Setting up conversation flow for the buddy method
And that's it, it'll work from here! Give it a shot!
Showing off the buddy method setup working
⚠️ Don't forget that you need to grant this role to the user who speaks the language natively.
🎉 You're All Set!
Whether you went with the full Complex Language Views setup or the lightweight Buddy Method, you’ve just made your Discord server way more inclusive, accessible, and user-friendly. HephBot is now handling the language magic behind the scenes so your community can just… talk. Naturally. Effortlessly. In any language. 🌍
✨ Let your members focus on the conversation — not the translation.
💬 Let friendships grow across borders.
⚙️ And rest easy knowing HephBot is taking care of the heavy lifting.
Need help? Want to tweak things further?
Check out the Commands List or hop into the Support Server — we're always here to help.
Now go enjoy the multilingual chaos you just tamed.
You’ve earned it. 😎